Saturday, January 31, 2015

Date Night Patricia

Oy!  This one was a disaster.  I still haven't actually finished it, although I think the final version is okay.

I had this vision of this cute knit tunic with a light flowy gathered back.  I'd seen woven versions of what I wanted so I figured I'd try it.  Well we all have to have some fails, right?

I started by going down 2 sizes- this was arbitrary as I just chose 2 sizes since I already had the Large printed, cut and taped.  I narrowed the back a little as I wanted it more t-shirt fitting- here's where things went wrong.  I should have pulled out a t-shirt pattern before cutting the fabric as I only had enough to cut once.

I basted everything, except the sleeves together to see how it fit.  Well the back was too narrow.


At this point, I pulled out the t-shirt pattern and realized it was just not going to work.  I decided to try something different to add width-

I didn't like how this looked on.  I went ahead and added a rectangular strip to the back in order to widen in and sewed up the top with the original straight across gathering.  I then tried it on and it was awful!  I'll try to work up the courage to take a picture to share later.  

I still wanted to submit an entry so on to take 2.  

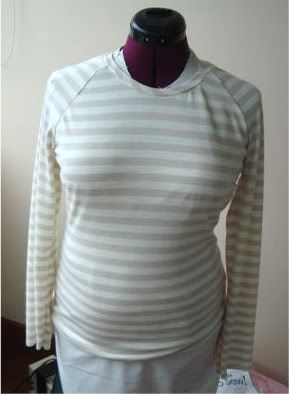
Again I went with a knit, this time a slinky sweater knit.  That really would not be my first choice for this pattern but it actually fits fairly well.  I fixed the back before cutting this one.  


So, I looked at the tunic and decided I'd made a boring black tunic sweater.  I didn't necessary want to jazz it up with color as I have no problem with black but I wanted something to make it more "date night."  

I decided to make the collar in suede and reshape it just a little bit.  


Turns out though my machine just did not like sewing this so it was giving me tons of fits.  I used a leather needle and had it on the leather setting but still it was just not happening.  I did manage to get it on the tunic but now need to go back and hand stitch it down.  


I used my serger to add sleeve cuffs.


I'm not in love but if I ever finish it, I'm sure it will get worn.  I need to stitch down the collar and do the hem.  Sometimes sewing is not all that fun.  

Wednesday, January 28, 2015

Chic & Casual Patricia

So this is why I don't blog!  I'm just now getting around to putting up my entry for week 1.  

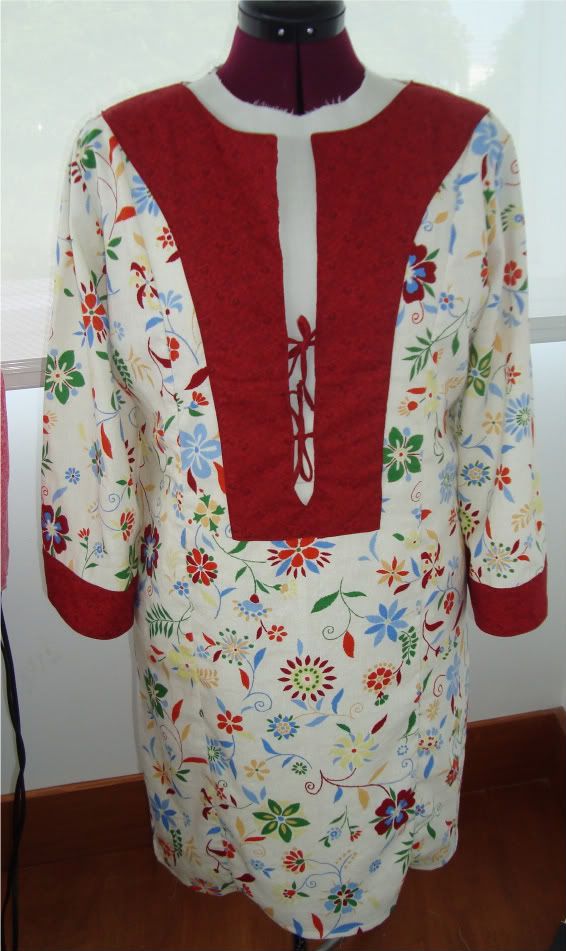
I started by taking new measurements.  I'm terrible about taking new measurements when I know they've increased.  Still I wanted to do this right, so new measurements and a new print out of the pattern.  I did some stash diving and found a print that had most of the colors from this spring's Panetone colors.  Perfect!  I, however,  didn't have enough for the full tunic so I decided to make the back in a matching color and to lower the back to do a hi-low hem.  Fun.


I started with the same sleeve adjustment to this one as I did to the one in the spring.  Basically I brought down the sleeve cap and re-drew the curve so I could sew the sleeve in without a pleat.


I also narrowed the sleeve as it went down since the straight sleeve still bells out on me.


Then I tackled the neckline, very willy-nilly.  I added an inch to the inside neckline of the front and the back.  I did smooth it out after.  


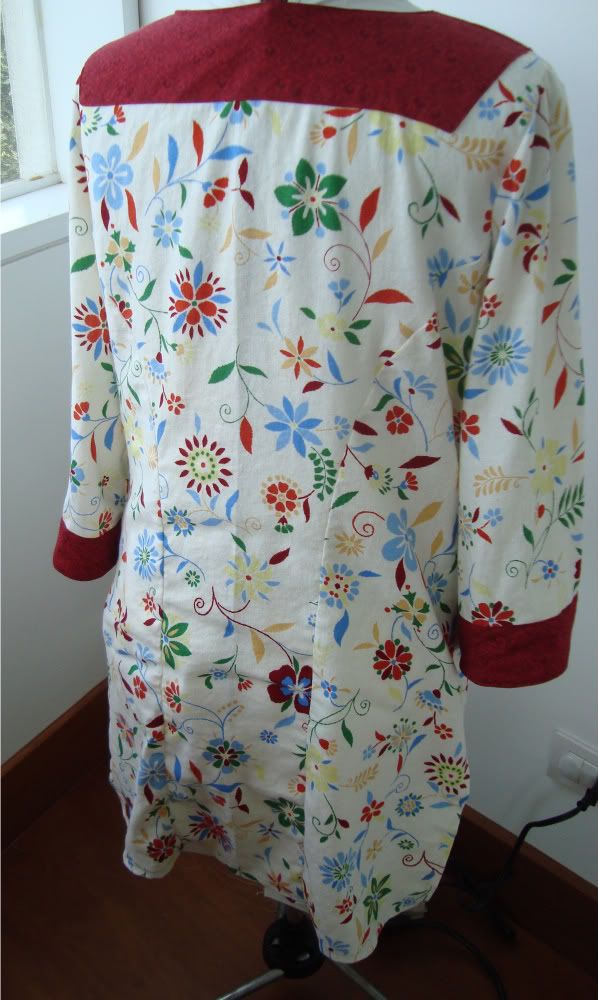
I also wanted to narrow the shoulders as I knew it would be to wide across.  I decided to do a dart on the back shoulder similar to an Ottobre pattern I'd just been sewing over the holidays.  I liked the way the back of that shirt sat on me.  


I redrew the entire back with the hi-low hem.  I used the Marco pattern for the curve.  


I also took in the front shoulder along the princess seam to match the new back shoulder.  No picture, it was a little trial and error as I had to keep taking it in to the bust point until it was smooth.  

These pictures are the basted version, I wanted to make sure everything fit nicely before I sewed it up.  I muslined the sleeve because I have larger biceps and needed to make sure the sleeve was going to fit before I cut the last of the fabric I had.  


I think it turned out almost perfect.  I love the look.  I am modeling with a turtleneck because its still too cold around here to wear it without but I like it better without.  I'm waiting until it warms up a little to wear it.  


Its still a little wider across the back than I'd like, so I'll correct that in the next version.  I also think it can come in under the bust on the princess seams as it stands out a little there.  Of course that might be the weight of this particular fabric.  Overall I think it worked out great.  


Wednesday, January 7, 2015

Just for Me January

Okay take 2- I'd written a nice post to start off this month and its disappeared!  Uhm... wonder if 5 years between posts is just too long.

Anyway, I have decided to document my month's endeavors for the Scientific Seamstress' January Challenge.

Just for Me January

To make this easy for me and, hopefully, satisfying I decided also to work on just one pattern for all four weeks.  I'm using the Patricia.


The Patricia was my first Sis Boom pattern.  Its one I've always wanted to LOVE but only just like.  The style is great and the fit is forgiving but somehow it never turned out how I wanted.  I did blog about one here- My first Patricia Tunic.  I loved the fabric, the style and even the fit at first.  Something about it bugged me so I really only wore it a handful of times before giving it away.

I did make a more recent version last Spring.  Again I loved the idea of the tunic and do wear it quite a bit.  However I find myself fussing with it constantly.  Tugging it here, tugging it there, all leads me to conclude the fit just isn't working.  I do think the style looks good on me so I'm going to turn this pattern into a TNT!


Some of the things I've decided to work on are- the boat neck, its not working for me, I find myself tugging it over all day long.  The other is the front opening, the way it swings open like that.  In addition its just too high when closed, which could be why its constantly opening  And the sleeves, which I'd actually fixed for the Spring version.  I don't really like the pleating on the top of the sleeve, makes my already broad shoulders broader.  

Okay, so if there are so many things, why this pattern?  Because I love it!  The pieces come together so nicely, the style is easy-breezy, the directions and options are amazing, plus I already own it.  

Stay tuned for the journey.  

Wednesday, October 27, 2010

Marine Ball Dress 2010 in progress

So after 9 years of marriage, dh has finally agreed to go to one of those fancy balls the military likes to throw. Of course, it might be more that his office has pretty much mandated everyone go.

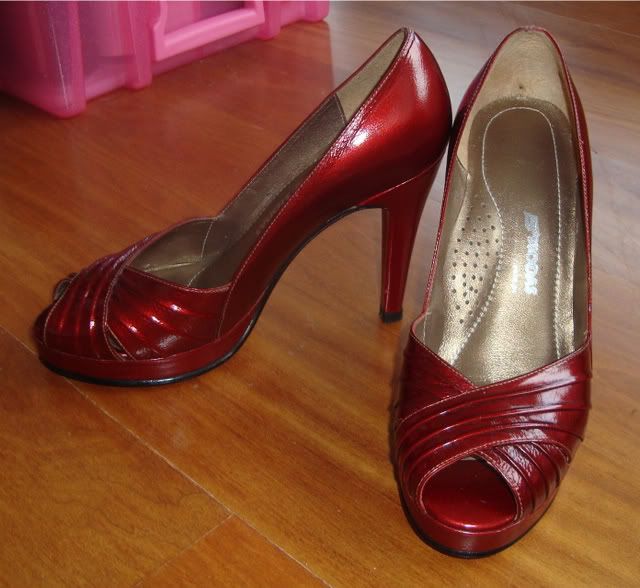
I figured I'd make my dress. I had planned on using a purple taffeta that I have collecting dust in my stash. I also figured I'd splurge on shoes since I was making the dress. Well my shoe shopping expedition lead to these:


I couldn't resist them. No- they didn't have my size in black. Plus they were not as dramatic.

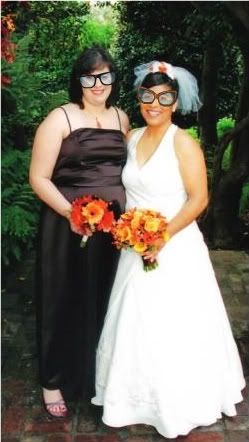
Okay, so on to the dress. I now needed a dress to match my red shoes out of my stash. Unfortunately the only thing I had with enough yardage was green silk. Yeah, NO. So I remembered that I still had the bridesmaid dress I wore to my bf's wedding almost 6 years ago, also collecting dust.
That dress was a size 22/24ish since I was almost 7 months pregnant with whirlwind #1 at the wedding. There was more than enough fabric with a bit of creative cutting for the dress I had been envisioning. I found a beautiful red silk to use with the brown.

Now I know I'm a few years behind the times but I really wanted an off-the-shoulder dress. I had planned on a super simple off-the-shoulder with a straight bottom and a slit. There was a pattern I could have purchased that would have worked but I decided to give my Wild Ginger Software a twirl.

When I got it almost 2 years ago I had done a sloper but didn't get very far after finding out I was pregnant with my second whirlwind. It was sort of fun finding out that my measurements are almost exactly the same- my hips were actually an inch smaller now! So I didn't bother with a new sloper, for now.

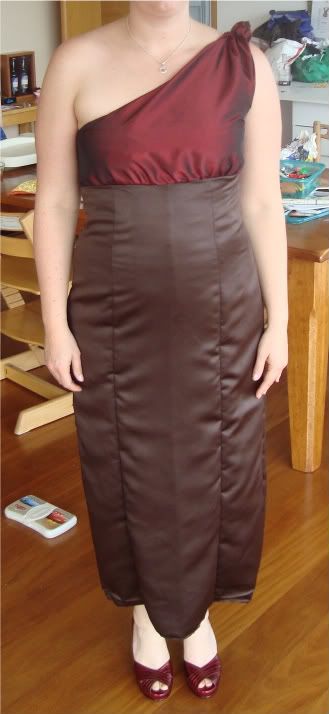
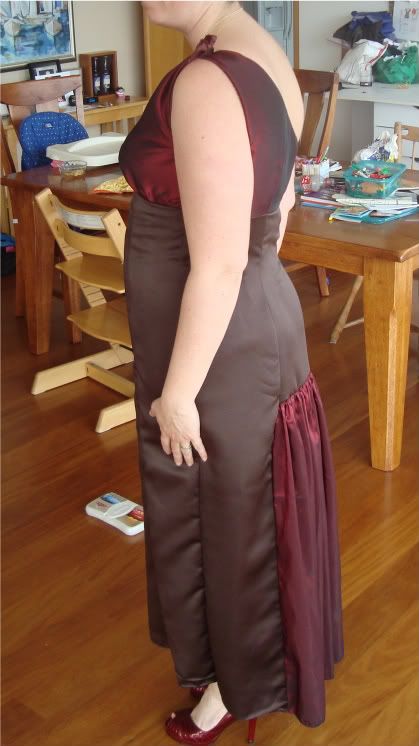
On to the dress:
the shoulder is just pinned for now. I need to go back and iron those seams better, I swear they are not as wiggly in person. I took special care to make sure the front was all on grain too. Uhm...


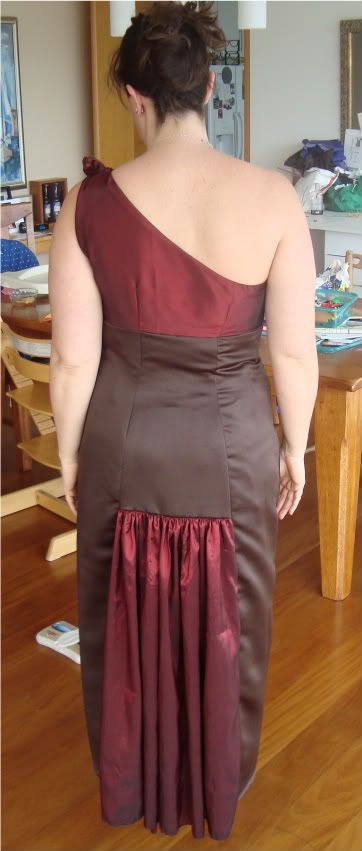
I'm planning on inserting boning to hold up the down side- I'm thinking thats what is causing the side bunching. But I love this view! See the seams aren't wonky.

And a semi-side view.


What do you think?

Monday, July 5, 2010

Patricia Tunic

This tunic was one of the 3 items I actually finished for my mini swap. It was done when I posted about the mini SWAP but forgot about blogging about it.


Anyway the pattern is Sis & Bloom's Patricia Tunic. Its an instant download on YCMT and is fabulous! The directions are an overwhelming 200+ pages, well really its only 50 pages- the rest is the pattern itself. With these directions a beginner could easily sew this up.

I made the size Medium since I didn't want it too big, at the time my measurements were between Medium and Large. Even so, I found it a bit roomy through the shoulders. Since then I've lost weight and need to definitely take it in through the shoulder area. I'll be morphing the Small and Medium together for my next tunic.

I made 2 other alterations for fit and necessity. I'm still nursing my munchkin so I lowered the front opening to enable that. I added about 3 inches to the front facing and slit, very easy to do.

The other alteration was to help the fit with my sway back. I put princess seams in the back so that I could get a better fit.


The one problem I had with the tunic was the opening. It wants to fold open when I wear it. I'm not sure how to fix that problem. Still I love this tunic. I wore it with leggings and a nursing tank this past summer/spring. I'll definitely be making more for next spring/summer. Actually I'm thinking of using this pattern as a base for a nightgown I want to make.

Wednesday, June 30, 2010

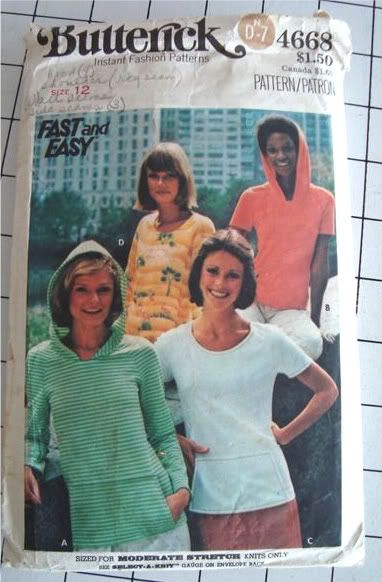
Buttericks 4668 (OOP)

Nothing has really been exciting me lately so I've been really lax on my blogging- not that that is anything new. I've been working on a ton of stuff. I have the kids' quilts 90% done. I'll finish the Serger Quilt posts soon.
So in the mean time, I got this gorgeous wool jersey from Fashion Fabrics Club last week. Its so soft, dreamy. I decided to make myself a simple raglan tee with it. It turned out a tiny bit long but otherwise fits great! I used this OOP Buttericks pattern I bought at a thrift store for 25 cents. Its a great pattern. This top is the second one I've made. The pattern has darts on the shoulders which I did in the first version but I took out for this one. I like it much better this way. I also bound the neck instead of just hemming it.

Here's a terrible pic of me wearing the shirt with a sweater vest I made as well, but I'll post that in another blog. Not very fashionable but I love it, so cozy and warm.

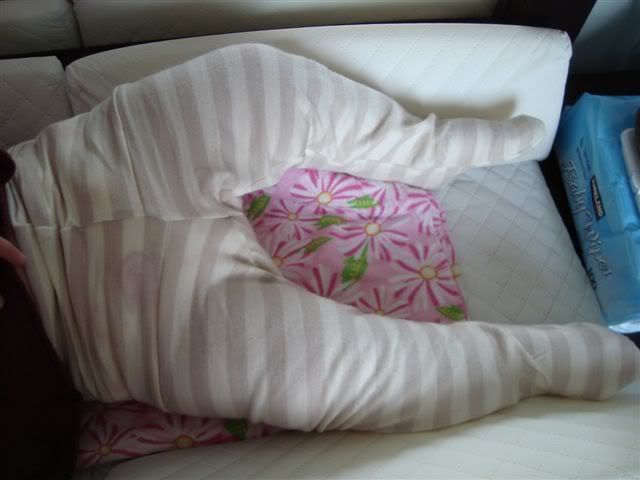
Oh, and I had enough bits left over to make some tights for my little one. I cloth diaper so these wool tights are great under the wool skirties she wears over her dipes. I think I'm going to have to buy more of this jersey to make us both some more stuff!

Thursday, February 25, 2010

Uhm... February is almost done

And I am far from done! I finally got all the patterns traced that I need for my mini-swap. Yesterday the pesky small child slept a good 2 hours so I was able to get 4 items 90% cut out. Still need to cut the linings and interfacing. Both pants are cut so I'm going to start those as soon as I get a chance to sew.

I did actually complete a few things not related this month. I recycled a Hawaiian shirt for ds for Hawaiian shirt day tomorrow. I used one of dh's old ones, even kept the tags and everything. I'll post it later- internet is running too slow right now. I also attached the buttons on my sewing machine! First time I've ever done that. It wasn't too hard, definitely will be doing it again.

I also finished up some random UFOs and parts of diapers (waiting on snaps to finish). I used one of the Made by Mama tags I got from Diaper Diva on ds' jellybean jamma shorts, he was so thrilled. Those have been in the UFO pile since about May. He's worn them to bed every night since, uhm... better do the laundry. ;)

Right now I'm waiting for the plumbers to finish so I can maybe, maybe sew before the baby wakes. Spoke too soon- I'm hearing whimpers. Oh well, there's always tomorrow.

Saturday, February 13, 2010

Mini-Swap for me

I can't believe its already mid-February, eeck! I had decided that February I would do a mini-swap as part of the Stash Game on Sewing Mamas but alas I did not sign up. Turns out thats a good thing since I've sewn 2 items since the beginning of February, well excluding the 2-3 diapers I finished up.

Still I'm going to work on the mini-swap since I find myself back at my pre-pregnancy weight with little to wear. My pre-pregnancy clothes are winter clothes and it is summer here. My summer clothes are either too big or too small, as my pre-pregnancy weight was still 25 pounds over my ideal weight, which is what I was the previous summer. So I just need a few items to last through about mid-April when the weather starts to turn. Plus I'm nursing so all my tops need to be nursing friendly- I do not do the pull up thing, no way my tummy gets exposed!


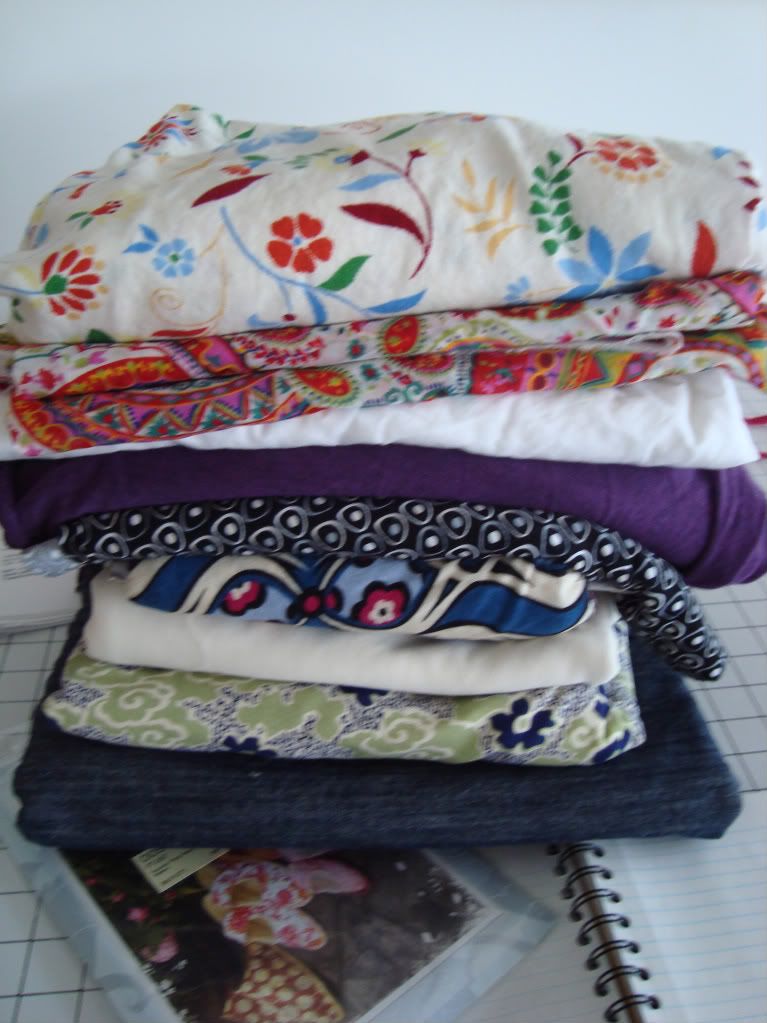
I've already picked out the patterns and fabrics. I've even completed the first item, the Patricia Tunic out of the linen blend on top of the stack. For the tops, I'm also going to make the Otto nursing top again (I've modified it so hopefully it will work better this time) in the green/blue/cream knit, Vogue 2980 in the cream knit, the Jalie Criss-cross top in the black with grey & white circles/dots, Kwik Sew 3434 in the blue/cream/white with fuschia flowers, and Burda WOF 3/08 #128 in the purple. For the pants I'm making Burda WOF 3/08 #126 in a Navy blue Faille and Ottobre 2/2009 #12 in denim. Everything should work great together. And for a dress I'm planning on making a combo of two of the dresses from Burda WOF 9/09 out of the paisley floral.

I also have accessories and a UFO on my list but we'll see how far I get. I've already been side tracked a bit with Sophie Tunic for my cousin's baby and I have 2 more cut out, one for my niece and one for my dd. I think I'd better just cut my stuff so that I have it ready to sew when I get the chance. I'll post as I can.

Serger Quilt part 3

I'm just putting in a place holder. I'm sure there's some fancy way to move the post back down so they are all together later but I'll just do this.

I came to a stop on the quilt b/c we moved and its now summer where we are. Knowing DS the minute I finish it he'll want to sleep with it and then he'll be plastered in sweat by morning. Yuck. Excuses, excuses!

Saturday, November 14, 2009

Serger Quilt Part 2

So now we sew it together. I love how quickly serger quilts come together. I'm all about the quick project. Of course, this would have been much quicker if I didn't have two rugrats limiting my sewing time.

I think this is Step 4:
Lay out the strips in the order you want them to be. I put it on my bed and tried to make sure there weren't matching squares across from eachother. Of course I ended up sewing them out of order so I did get two squares the same across from eachother, luckily with the black between them it isn't that noticeable. (No, I was not about to rip out serger stitching to fix it.)


Step 5: Serge quilt middle
For the first seam layer the pieces in this way- backing 1 face up, backing 2 face down, batting, strip 1 face up, strip 2 face down, batting.

Serge it together on one side. Then open up the seam and check carefully that you've serged all the fabric, go back and if you have any holes.

Continue adding the rows- backing fabric face up, quilt, new strip face down, batting

And that is where I am. The middle is serged together. Stay tuned for the next installment.

Serger Quilt part 1

I'm coming out of the wood-work! Seriously been busy sewing, having a baby and trying to sew! Anyway, before this one popped I promised my older one that I would make him a quilt. So here it is, I thought I'd show you all how I made it just in case anyone is interested. Its not done so you'll have to wait to see the finished product. The picture above is just the middle part laid out.

Step 1: cut out squares
The colorful prints were 6x6, I basically used whatever leftover scraps plus a few purchased pieces that he picked out.
The blacks are 6x8, I just didn't want to have to line up any seams. These were all purchase for this project.


Step 2: sew the strips, I serged them then ironed the seams


Step 3: measure your strips, then cut the backing and batting in 6xlength of strips
I used Warm and Natural for the batting and a print cotton fabric for the backing

more later...

Season of One Thimble!

Funny enough this Spring has really been the Season of One Thimble  (affiliate link).  It started off really innocently, I signed up for ...